Importing and Exporting in Excel- beginner's guide for data analysts
SHARE
Excel is a powerful tool widely used to manage and analyze large amounts of data. Excel provides several options for importing and exporting data, whether you are working with financial data, customer lists, or survey results. In this article, we will explore the basics of importing and exporting data in Excel, including file formats, importing data from external sources, exporting data to external sources, and best practices for data import/export.
Understanding File Formats (CSV, TXT, XLSX)
Before we delve into the specifics of importing and exporting data in Excel, it is vital to understand the many file types that Excel can read and write. CSV, TXT, and XLSX are the file types that are utilized the most frequently.
- CSV (Comma Separated Values) is a plain text file format that stores data in a tabular format. Every line in the file corresponds to a row in the table, and a comma is used to separate each field in a row.
- TXT, which stands for "Text File," is another plain text file format that can store data in a tabular arrangement. Unlike CSV files, which use a specific delimiter (usually a comma) to separate fields, TXT files can use any character or sequence of characters as a delimiter. For example, tabs, spaces, semicolons, pipes (|), or any other character or string can be used to separate fields in a TXT file.
- XLSX (Excel File) is the default file format used by Excel. XLSX stands for "Excel Spreadsheet XML", and it was introduced in Microsoft Office 2007 as a successor to the earlier XLS format. XLSX files can be opened and edited using Microsoft Excel or other spreadsheet software that supports the XLSX format, and they can also be exported to other file formats such as CSV, PDF, or HTML.
Importing Data from External Sources to Excel
In today's digital world, businesses, and individuals often need to work with data from a variety of external sources, such as databases, websites, text files, and other data repositories. Microsoft Excel, one of the most popular data analysis and management tools, provides several easy and efficient ways to import data from external sources. Here are some of the most popular methods:
- Copy and paste
This is the simplest method for importing data into Excel. You can copy data from an external source (such as a website or another Excel file) and paste it into Excel. However, this method may not work well for large datasets or data with complex structures.
- You can select the data you want to import, copy it using the copy command (Ctrl+C), and then paste it into an Excel worksheet using the paste command (Ctrl+V).
- If you copy a table structure (for example, a table with column headers and row labels), Excel will automatically detect the structure and import the data into corresponding rows and columns.
- If the data you are copying contains complex structures, such as merged cells or nested tables, Excel may not be able to import the data correctly or may require additional manual formatting to match the original structure.
- It's also worth noting that when copying and pasting data into Excel, the data is usually pasted as a table with formatting. This can sometimes lead to issues with formatting or data types, especially if the source data contains a mix of text and numeric values. In such cases, it may be helpful to copy the data into a text editor (such as Notepad) first, perform any necessary formatting or cleanup, and then paste it into Excel as plain text. This can help ensure that the data is imported correctly and in the desired format.
- Importing from Access
Access is a popular database management system that is used by many businesses to store and organize data. Here's how to import data from Access into Excel:
-
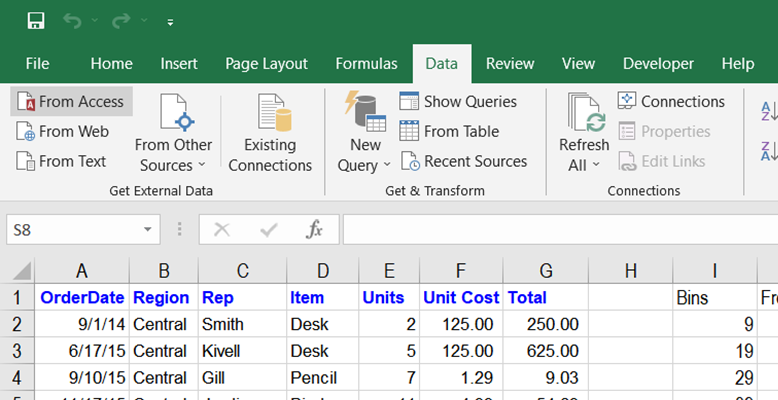
Open Excel and select the "Data" tab in the ribbon.
-
Click on "From Access" in the "Get External Data" section.
-
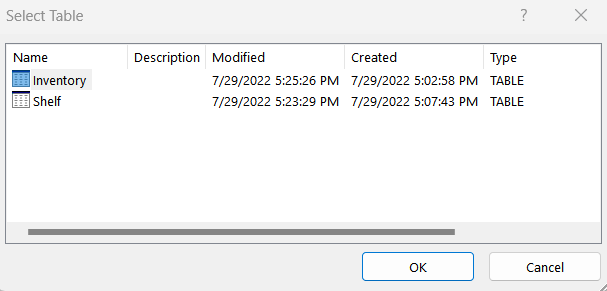
Navigate to the Access database file that you want to import data from.
-
Select the table or query you want to import and click "OK".
-
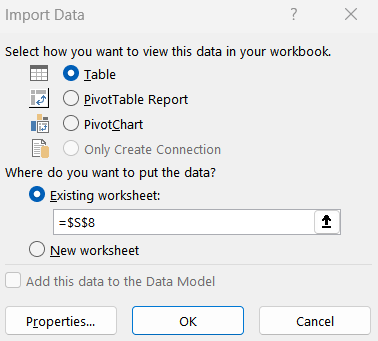
Select how you want to import that table or query into Excel and click “OK”.
- Importing from the web
The web is a vast data repository that can be useful for businesses and individuals. Here's how to import data from the web into Excel:
-
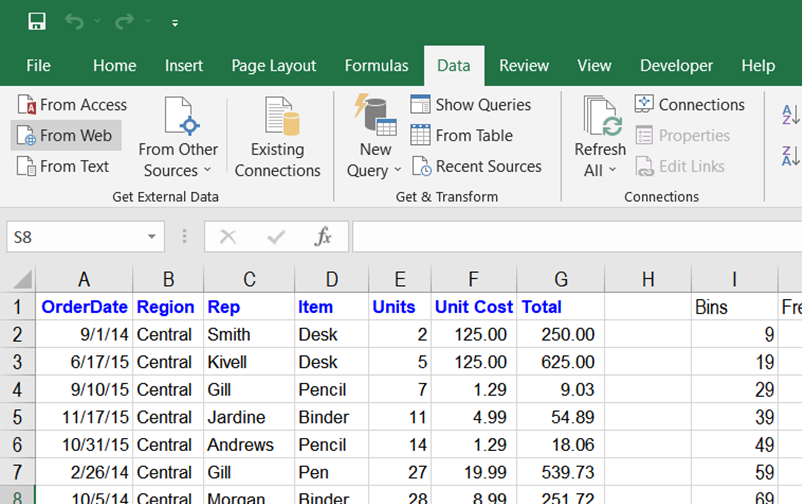
Open Excel and select the "Data" tab in the ribbon.
-
Click on "From Web" in the "Get External Data" section.
-
Enter the URL of the web page from which you want to import data.
-
Excel will load the web page and display all the tables or data you can select and import.
-
Select the table or data you want to import and click "Import" to import the data into Excel.
-
Select where to import that table or query into Excel and click “OK”.
Note: It's important to note that there may be some restrictions or technical issues when importing data from the web. For example, some websites may require you to have open access to the webpage or may have restrictions on how the data can be used or shared. Additionally, some websites may use complex or dynamic web page structures that can make it difficult to extract the data you want. In these cases, you may need to use specialized tools or techniques to extract the data, such as web scraping or APIs (Application Programming Interfaces).
- Importing from text files
Text files are commonly used for storing and exchanging data. Here's how to import data from text files into Excel:
- Open Excel and select the "Data" tab in the ribbon.
- Click on "From Text" in the "Get External Data" section.
- Browse and select the text file from which you want to import data.
- Follow the on-screen instructions to specify the file format and delimiter settings and click “Next”.
- review the data and make any necessary adjustments and click “Finish.”
- If the file type is "Delimited," select the delimiter used in the file (e.g. comma, tab, semicolon, space) and any text qualifiers (e.g. quotes).
- Preview the data and make any necessary adjustments.
- Click "Finish" to import the data into Excel.
- It's important to choose the correct delimiter setting to ensure that the data is imported correctly into Excel. If you choose the wrong delimiter setting or don't specify a delimiter, Excel may import the data incorrectly or not at all.
- Importing from other sources
Excel also supports importing data from a variety of other sources, such as XML files, SharePoint lists, and OData feeds. Here's how to import data from other sources into Excel.
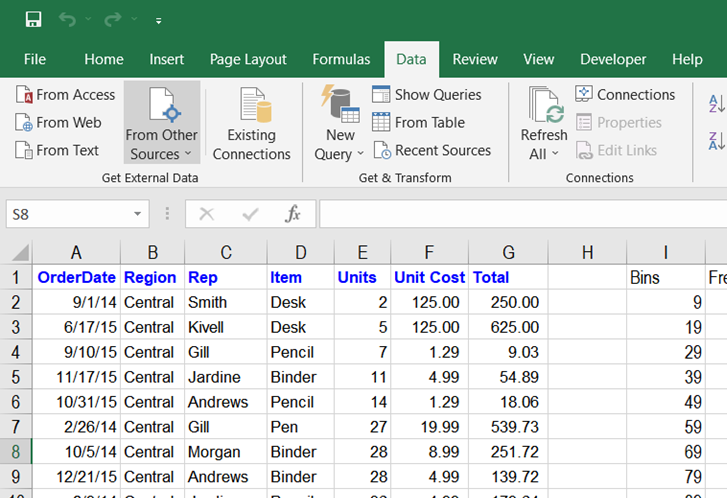
- Open Excel and select the "Data" tab in the ribbon.
- Click on "From Other Sources" in the "Get External Data" section.
- Choose the type of data source you want to connect to.
- Enter the required details to connect to the data source (e.g., file path, URL, authentication method, etc.).
- Follow the on-screen instructions to select the data you want to import and specify any filters or transformations.
- Click "Finish" to import the data into Excel.
Excel provides several easy and efficient ways to import data from a variety of external sources. Following the steps outlined above, you can quickly and easily import data from Access, the web, text files, and other sources into Excel for analysis, reporting, and other purposes. With this knowledge, you can easily and effectively work with data from a variety of sources, making it easier to get the information you need to make better decisions and drive success in your personal or professional life.
Exporting Data to External Sources from Excel
Whether you need to share your data with colleagues or partners or you want to import it into another application for further analysis, Excel makes it easy to export your data in a variety of formats. Exporting data from Excel can be done in several ways, depending on your needs and the type of data you want to export. Here, we'll explore some of the most common Excel data export methods.
- Exporting Data to CSV
CSV, or Comma Separated Values, is a popular file format for exporting and importing data between software applications. Here's how to export data to CSV in Excel:
- Open the file you want to export.
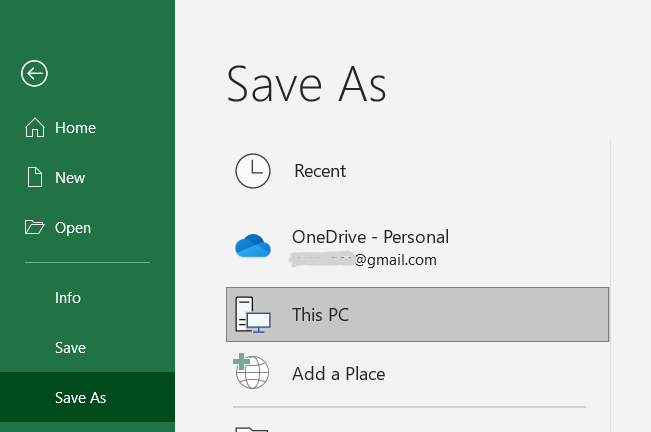
- Click the "File" tab, then select "Save As".
- Choose the location where you want to save the file.
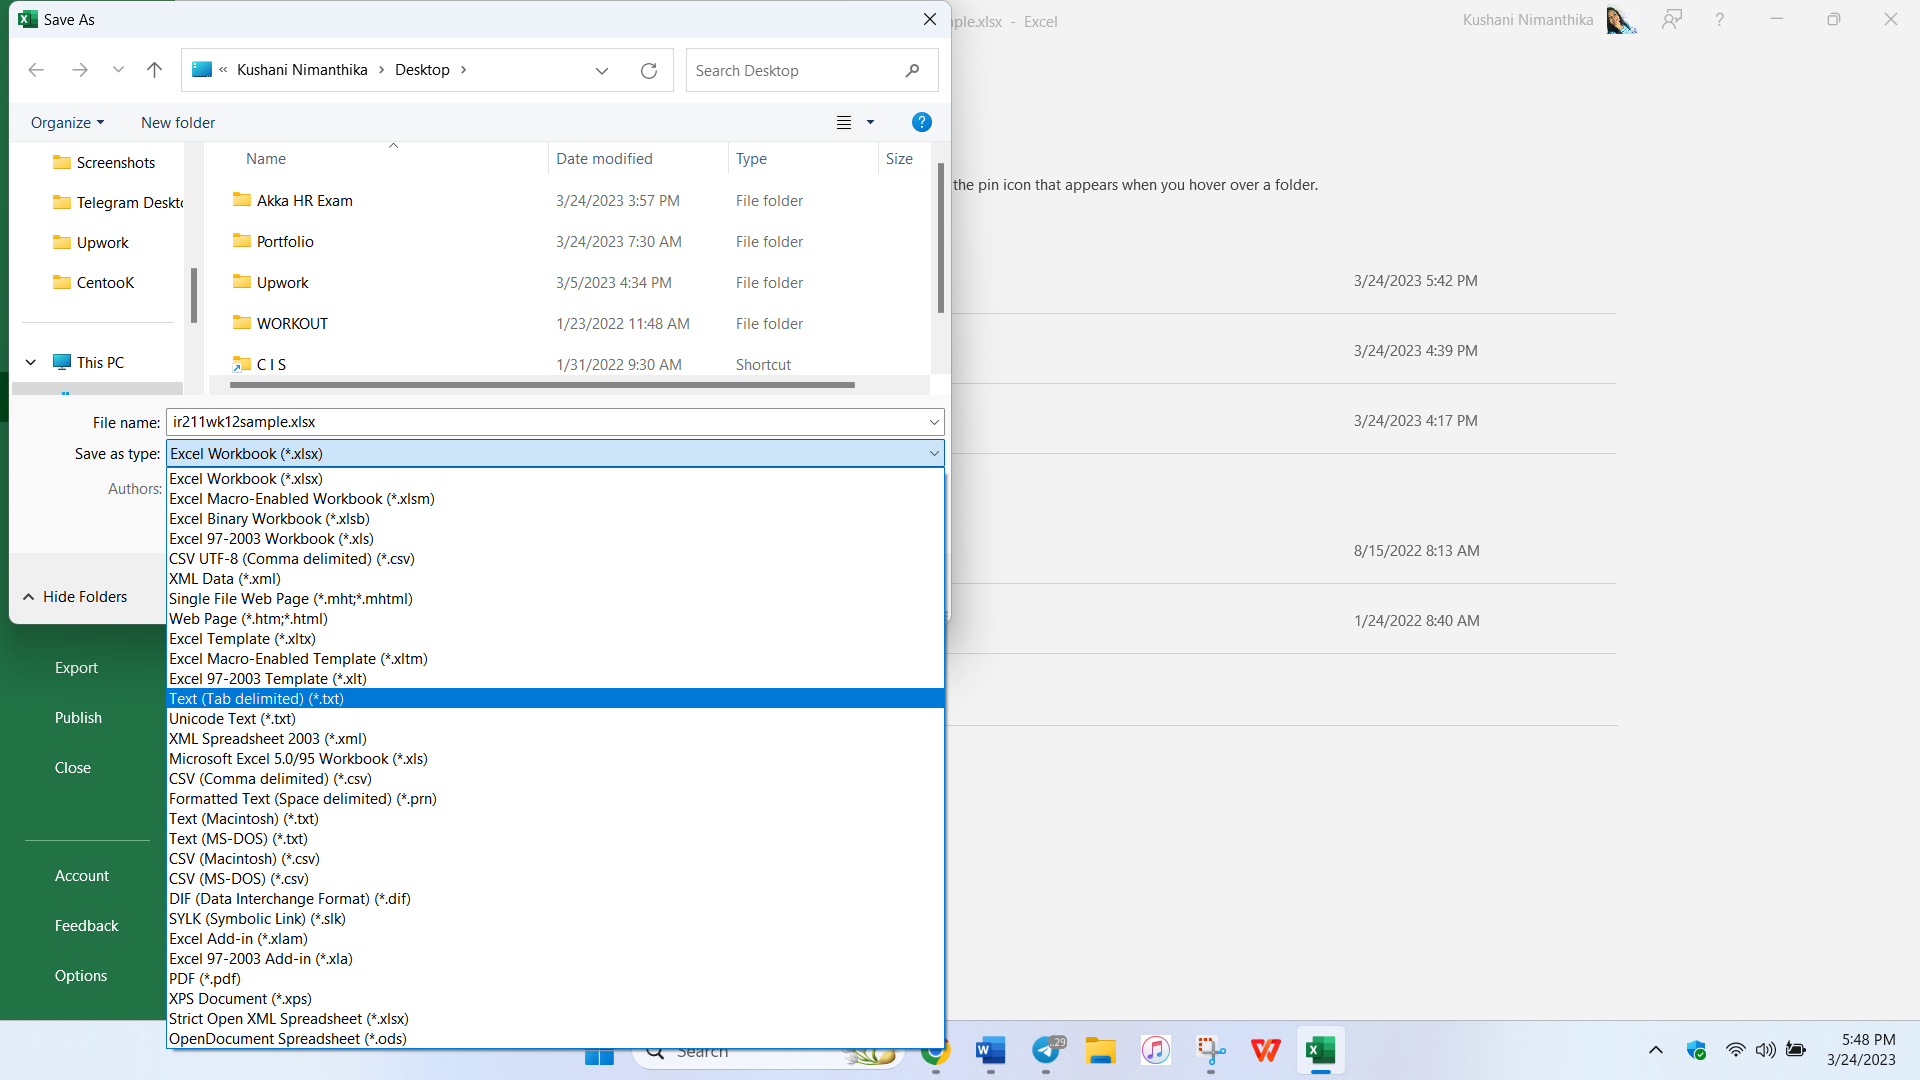
- In the "Save as type" dropdown, select "CSV (Comma delimited)".
- Click "Save".
- A dialog box will appear, asking if you want to export the active sheet or the entire workbook. Click "OK" to export the active sheet.
Your data will now be saved in CSV format and easily imported into other software applications.
- Exporting Data to Text
Exporting data to text is similar to exporting to CSV, but with some differences in the file format. Here's how to export data to text in Excel:
- Open the file you want to export.
- Click the "File" tab, then select "Save As".
- Choose the location where you want to save the file.
- In the "Save as type" dropdown, select "Text (Tab delimited)".
- Click "Save".
- A dialog box will appear, asking if you want to export the active sheet or the entire workbook. Click "OK" to export the active sheet.
Your data will now be saved in text format, with tabs separating each column.
- Exporting Data to Pdf
Here's how to export data to PDF in Excel:
- Open the file you want to export.
- Click the "File" tab, then select "Save As".
- Choose the location where you want to save the file.
- In the "Save as type" dropdown, select "PDF".
- Select the options for the PDF. You will see several options for the PDF file, including optimizing the PDF for printing or online viewing.
- Click "Save."
And that's it! You have successfully exported your data to PDF from Excel. The resulting PDF file will contain all of the selected data, formatted in a way that is easy to read and share with others.
Limitations of exporting Excel data to different formats
Here are some limitations to keep in mind when exporting Excel data to different formats.
- Data formatting: When exporting data from Excel to different formats, the formatting of the data may not always be preserved. For example, if you have a complex formatting in Excel such as merged cells, conditional formatting, or chart objects, these may not be properly exported to other formats.
- Data loss: Depending on the format you choose to export to, there may be some loss of data during the export process. For example, when exporting to CSV format, any formulas or calculated values may be lost.
- Large datasets: Exporting large datasets from Excel to other formats may take a significant amount of time and may also require more memory than your computer can handle. In some cases, it may be necessary to break up large datasets into smaller chunks before exporting.
- Compatibility: Not all software applications are compatible with all file formats. For example, if you are exporting data to a proprietary format such as Microsoft Access, the recipient may not have access to that software and may not be able to open the file. It's important to keep these limitations in mind when exporting data from Excel to other formats and to test the exported file to ensure that the data is accurate and properly formatted.
Best Practices for Importing and Exporting Data in Microsoft Excel
It's important to follow best practices when importing and exporting data to ensure accuracy and consistency in Excel. Here are some best practices to keep in mind when importing and exporting data in Excel:
- Check data integrity: Before importing data into Excel, make sure the data is clean and error-free. This will prevent errors and inconsistencies when the data is imported into Excel. Similarly, before exporting data from Excel, review the data to ensure accuracy and completeness.
- Use proper formatting: Ensure the data you're importing is formatted correctly for Excel. For example, if you're importing data from a text file, make sure commas or tabs separate the fields. If the data is not formatted correctly, you may need to reformat it before importing it into Excel.
- Choose the appropriate file format: When exporting data from Excel, choose the proper file format. For example, if you're exporting data to be used in another application, select a file format that is compatible with that application.
- Use data validation: Use data validation to ensure that the data being imported into Excel is accurate and valid. Data validation can prevent users from entering incorrect or invalid data.
- Be mindful of column widths: When importing data into Excel, be mindful of the width of the columns. If the data in a column is wider than the column width, the data may be truncated or hidden. Similarly, when exporting data from Excel, be mindful of the width of the columns in the output file.
- Use meaningful column headers: When importing data into Excel, use meaningful column headers. This will make it easier to work with the data and ensure it is properly labeled.
- Avoid using merged cells: Avoid using merged cells when importing or exporting data in Excel. Merged cells can cause issues with sorting and filtering data.
- Test the import/export process: Test the import/export process with a small amount of data before importing or exporting large amounts of data. This will help identify any issues arising during the import/export process. By following these best practices, you can ensure that the Excel data you import and export is accurate, consistent, and easy to work with.
SHARE